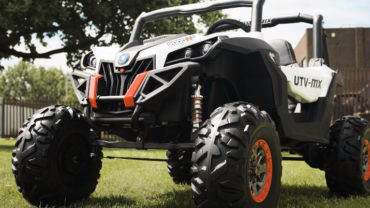
Learning- How To Lift Power Wheels
Well, it’s a new and exciting topic on our blog. It’s about- how to lift power wheels. You’ll need pieces from old Power Wheels to accomplish so. Then, you must reassemble them in your toy automobile in order to increase the distance between it and the ground. You may need to alter the height of your Power Wheels if you reside in a hilly area.
The underside of the toy car will be less likely to clash with potholes in the road because of the improved clearance. In total, there’ll be around 5-6 steps to life power wheels properly. Finally, you can test your power wheels for satisfaction.
You will need to purchase a number of goods as well as gather a number of tools in order to complete the alteration. The majority of the tools you own are usually stored in your garage. Well, all being said, let’s get started and find out how to do the lifting with efficiency.
What You’ll Need- Power Wheel Lifting
Hardware stores and online retailers like Amazon carry the necessary materials. It’s best if you plan everything out ahead of time so that the transition is as smooth as possible.
- Bolts and Steering shaft
- Old Power Wheels
- A handsaw
- Razor
- Drill
- Screwdriver
- Wrench
It would be preferable to use a steering shaft to bridge the gap and reach the new wheel axles underneath the vehicle. There are various parts available online that may be installed in a toy automobile without the use of any tools.
How to Raise and Lower Power Wheels
The majority of parents who lift their Power Wheels Trucks a few inches off the ground do it with welded pieces, which are costly and require welding knowledge. The procedure outlined below entails adding parts to your Power Wheels to give them more height.
To perform it as a garage DIY project, you don’t need to learn any new skills.
Buy Some Old Power Wheels
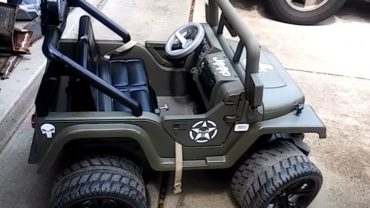
You can look for an old Power Wheels Jeep or truck that matches the make and model of the one you want to modify at yard sales and outdoor markets.
The old car must be of the same make as yours. If you buy a different model, regardless of how cheap it is, the modification will not happen as planned. The tops of most vintage toy cars are worn out, but the bottoms are still functional. The vehicle’s underside should ideally have a dark hue.
Once you arrive home, wash your car since you’ll need to be able to see where you’re cutting in order to be precise. Because it is the only part of the car that you will use, you may always wash the undercarriage with a hosepipe if you so choose.
Cutting- Parts of the Front and Back
When you remove the old toy car seats, you’ll see a trough-like section with the back wheels at the bottom. The front section is similar, except it features elements of the steering wheel that pass through it.
Cut the portions that the wheels are attached to the wheels with a hand saw. To fit the parts in your other Power Wheels, you trim them as high as feasible. Cutting large chunks also allows you to change the parts of your play automobile.
Before cutting the bottom section, you’ll need to remove the steering wheel and shaft from the front. You should finish up with two trough-like pieces at the bottom, each with a wheel.
Tire Removal from Power Wheels
Because the pieces have tires, remove the tires from your Power Wheels. You can replace worn out tires on the parts with a wheel from the Power Wheels you’re working on.
Before proceeding, perform a last check to confirm that the wheels are securely in place. How To Change Power Wheels Tires.
Replacing the Parts
Your following step will need that you remove the seats from your vehicle. You can also remove the batteries from the underside of the car. So, mount the pieces to the Power Wheels in the correct locations.
The steering shaft under the hood should be in line with the places where the front wheels go under the hood. As a result, it will be simple to determine where the steering shaft has to be modified.
Add the vehicle’s rear wheels. Nothing should need to be pushed together. Adding original Power Wheels pieces adds 5-6 inches in height. Finally, the last step is to assemble the parts.
Bolt Parts
Each side needs two bolt holes above the wheel. Add a hole in the center of the front and rear to secure them. Drill holes in your Power Wheels and parts. Before installing the bolts, trim any surplus components with a razor.
Install the Power Wheels bolts and tighten the screws using a wrench. If you think the addition isn’t secure, drill more holes. Since the pieces fit together, the bolts add further security.
Shaft Steering
To control the vehicle’s direction, you must add the steering shaft. Modify the steering shaft to fit the customized toy vehicle.
Finally, connect the steering wheel to the shaft.
Test Driving
Reinstall the seat and batteries before taking a test drive with the remote control. Next, let your youngsters try out the elevated Power Wheels first.
Keep a watch on your child at first to ensure the customized Power Wheels work properly. How to Charge Power Wheels Wild Thing.
Final Thoughts
Many parents are curious about how to lift a Power Wheels jeep or truck to increase ground clearance. But, when compared to alternative modification options, using an old toy car saves you time and money.
Yard sales, online auctions, and open markets are all good places to look for an old make and model that looks exactly like your Power Wheels. Parents are constantly getting rid of Power Wheels that their children no longer play with.
If you’re new to toy car upgrades, the modification should take you approximately two hours to accomplish. So, it’ll take less time for someone who is knowledgeable with Power Wheels. How to Charge Power Wheels Battery 12V.